How to Use a Hotshoe Flash
Flash features are great but, how do you actually use a flash? Keep reading to learn how.
In a previous post, I went through some of the most common features you may find in a hotshoe flash. It was not a comprehensive list, but more of a general view of hotshoe flashes.
How Do You Use a Flash?
But, how do you actually use a flash on your camera’s hotshoe? It’s actually a matter of remembering a formula and some simple calculations, as you’ll see later in this post.
Even though I use other flashes, for this explanation I’m going to use a simple flash. This flash doesn’t zoom, doesn’t tilt nor swivel and it’s powered by the camera: Fujifilm’s EF-X8.
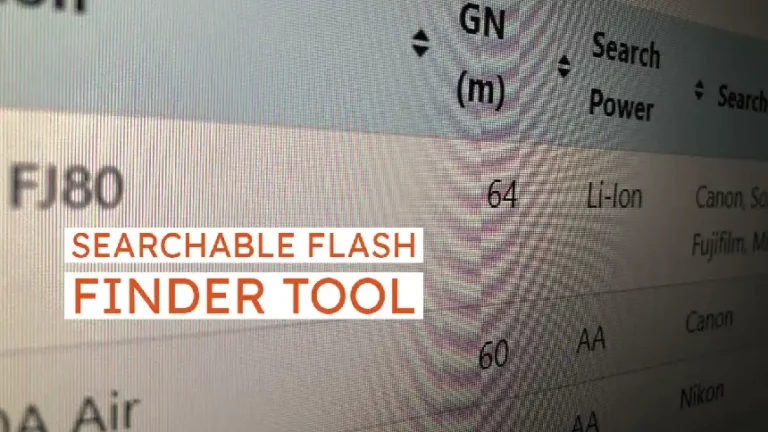
Guide Number
While going through the flash features, I explained that the main characteristic in a flash is its Guide Number (GN). This is a measure of the flash power. It’s described as the theoretical coverage distance of a flash under specific conditions.
The usual conditions used to describe this coverage distance are:
- The flash is set to maximum power
- The flash’s zoom is set to its longest setting
- The camera is set to ISO 100
- The lens has an aperture of f/1
That last bit may seem odd, because f/1 lenses are not common. However, we need to remember these are all theoretical conditions. Once we use our own camera settings, we’ll be able to determine the actual coverage of a flash. We’ll need a special formula.
The Formula
The formula that describes how to determine the actual coverage distance goes like this:
Distance (d) = GN/ Lens Aperture (f)
The EF-X8 has a GN of 8 meters (26 ft). I plan to shoot at f/1.4. So, the actual coverage distance will be:
8m/1.4 = 5.7m (18 ft).
In the example below, Jessica (my model) is standing 5.7m away from my camera and flash. I set the camera to ISO 100, 1/250 s and pressed the shutter button.

As you can see, the exposure on her is correct but the rest of the scene looks a bit dark.
Now that I look at the scene, I want to shoot closer to Jessica, in order to make medium shot portraits. Considering the lens I’m using (35mm), she should be about 2 m away from the camera.
In this case, I know the distance. I need to know the aperture to use and expose my model correctly. The formula changes a bit:
Lens Aperture (f) = GN/Distance (d)
So, the aperture I need to use is 8m/2m = f/4. After adjusting the aperture, I pressed the shutter button and voilá! The exposure on Jessica is correct now.

Power Settings?
But wait, what if I want to shoot at f/1.4, with my model 2 meters away from me? I want a medium shot with a shallow depth of field! Well, it’s time for us to adjust the flash’s power settings.
Up to this point we’ve used the flash at maximum power, expressed as 1/1. Considering the current aperture, we can make a table that explains how we can use a lower power setting and how we need to compensate the lack of light coming from the flash with a wider aperture.
In this case (GN = 8 m, d = 2 m), the table goes like this.
| Power | Aperture |
|---|---|
| 1/1 | f/4 |
| 1/2 | f/2.8 |
| 1/4 | f/2 |
| 1/8 | f/1.4 |
According to the table, if I want to shoot at f/1.4, the flash power should be ⅛. So I set the flash power, opened the lens aperture and pressed the shutter again. Jessica is correctly exposed, again! :-)

You now know how to use a hotshoe flash! It’s not super complex, but it takes time to make some calculations. Over time and with a lot of practice, you’ll be able to see a scene and determine the lens aperture and power setting of your flash, intuitively.
My question for you is: Have you used a flash this way? What was your experience? Please, leave a comment below.