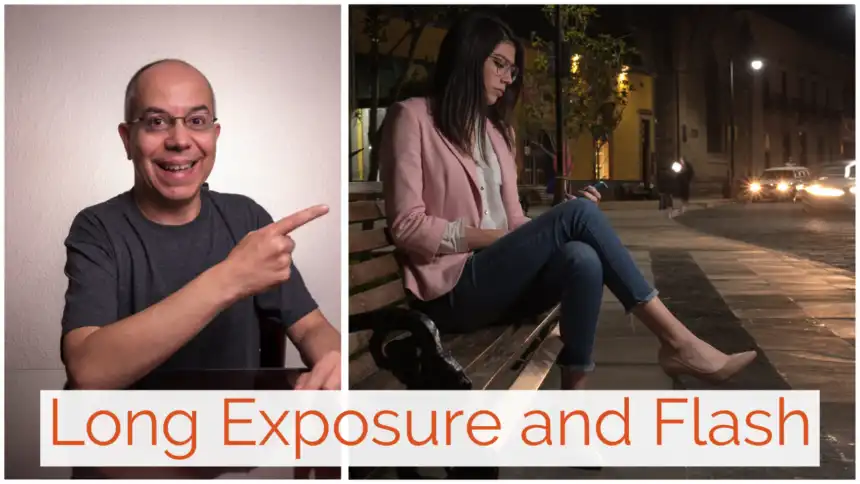
Shooting Long Exposure and Flash
I recently saw an image in a facebook group where the subject was frozen, but the context showed light trails. Some people commented that it was probably photoshopped, but you can make it in camera using long exposure and flash. Keep reading to learn how.
In order to create an image that combines light trails and a frozen subject, you need to mix two techniques: long exposure and balancing ambient with flash. You need to use the principles of exposing for the highlights, and adding flash to your subject. This allows you to show the subject frozen in time, while showing the passage of time using light trails or so.
All this sounds great, but there are a few considerations to make, so I’d like to describe the process that I followed. In order to demonstrate this technique, I called Frida, who I had worked with before, and Ricardo, a good friend of mine who is also a photography enthusiast.
Select Your ISO and Exposure Time
I decided to use ISO 100, the lowest of my camera, so I could use long exposure times. I then set the exposure time (shutter speed) to 2 seconds. This time should allow for the light trails to be visible, considering the traffic was light and more or less consistent.
Adjust Aperture to Expose for Light Trails
The only thing left in the camera to adjust was the diaphragm aperture. According to the exposure meter, f/6.3 would create a neutral exposure, so I stopped down the aperture to f/8. This way, the image looked a little underexposed but the light trails looked well defined and not blown out.

Add Flash, Use 2nd Curtain Sync
Once I had an image that showed the light trails, it was time to add flash on Frida. I used a Godox TT685/Flashpoint R2 TTL Zoom inside a 90 cm (3 ft) Photoflex Octadome. The flash was zoomed in at 16mm so the light coming from the softbox was uniform. After a few tests I decided to use the flash at ½ power.


Nice, we have a great mix of long exposure and flash!

Post-process to Taste
Even though the image already looks great, I thought it looked a bit cold and dark for my taste. That’s why I went ahead and post-processed it a little, increasing the temperature, raising the shadows so we could see more details around Frida’s hair, and lowered the highlights so they were even more defined.

In the end, this combination of techniques allows you to create an image that looks interesting because of the contradiction: It shows the passage of time through the light trails, but it also freezes the subject in time through the flash.
I really hope you found this post interesting, informative but also entertaining. If that is the case, please leave a comment below and share this post with your friends! But most of all, please remember to Stay Safe, Keep Learning and Keep Creating.
DISCLAIMER: Links included in this post might be affiliate links. If you purchase a product or service with the links that I provide I may receive a small commission at no additional charge to you. Thank you for supporting this blog so I can continue to provide you with free content every week!