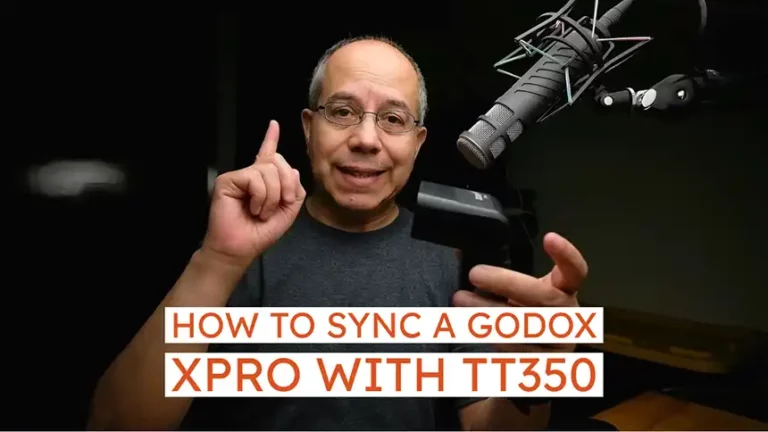
How to Sync a Godox TT600 with an XPro
In this post I’d like to explain how to make a Godox transmitter communicate with a Godox hotshoe flash. Specifically, how to sync a Godox TT600 with an XPro transmitter.
This post is the next in the series about off-camera flash. I’m trying to answer the most frequently asked question: how to connect or sync a transmitter with a hotshoe flash.
Let’s start with the TT600
If you turn the Godox TT600 on, you will see that it’s in Manual mode. It already has a power setting, and a zoom setting. We’re going to set it to Slave mode.
Radio Slave
Press and hold the MODE button until you see the antenna blinking. Then rotate the wheel until you see the “S” icon, press SET. This flash is now in Radio Slave mode.


You can see that the front of the flash is blinking. You cannot turn this off. It is the visual indicator that the flash is in Radio Slave mode.
We now need to make a couple decisions. What channel do we use? And, what group does this flash belong to?
Set the Channel
I strongly suggest you avoid channel number 1. Why? Because it is the default and many people keep using it. If you are in a place where somebody else is using a similar system, other transmitters may interfere with yours.
So, we change the channel by pressing and holding the Gr/CH button and then rotating the wheel.


I like using channel 9. There is no particular reason for it, I just like the number, it is my lucky number. You have 32 channels to choose from, so you have a lot of options.
Set the Group
Then, we’re going to choose a group for this flash. We’re going to press the Gr/CH button once, and you can see that the group changes. Every time you press the button, the group changes to the next letter. We have five options in the Godox TT600, from the letter A to letter E.
Let’s choose group A.
The flash is now ready to receive orders from a transmitter on Channel 9, directed towards anything on group A.
If there are orders directed towards Group B or C or D or E, this flash will ignore those orders. This flash will only follow the orders directed towards group A.
Let’s setup the XPro
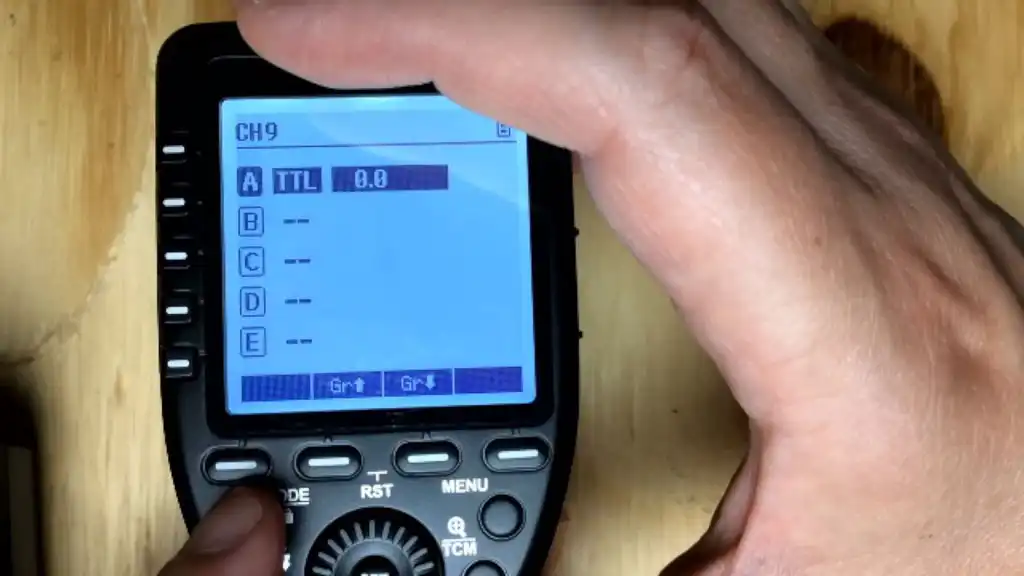
When we turn the Godox XPro on we can see a battery indicator and the current channel.
Set the Channel
In order to change the channel, we press and hold the button labeled as Zm/CH, until the channel number is highlighted. We then rotate the wheel to the same channel as we set on the flash. Otherwise, the flash won’t fire.


So, we set it to channel 9.
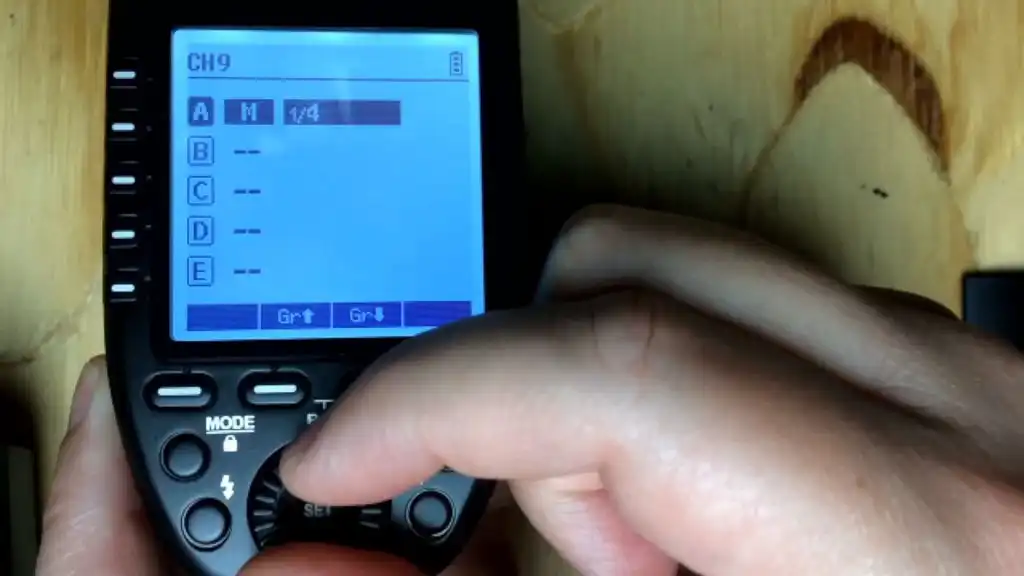
Select Group
There are five buttons on the Godox XPro to select groups. We press the first one to select group A.

Set Mode
Once we select a group, we need to press the MODE button to toggle between Off/TTL/Manual modes. We need to use Manual mode for this group, because the flash we’re using (TT600) is Manual-only.
Set Power
Once the group A is in Manual mode, we can rotate the wheel on the transmitter to change the group’s power setting. Let’s set it to 1/16 power and press SET.
Let’s try it out! If you press the test button, labeled with a thunderbolt, you should see that the TT600 fires.
Test With Camera
Now, let’s place the transmitter on a camera. I tested with a Fujifilm X-E3 set to 1/180th of a second (the camera’s max sync-speed), ISO 200 and f/5.6. if I press the shutter button the flash fires.


Summary
Let’s take a look at the steps again, shall we?
On the Flash:
- Set it to Radio Slave mode
- Choose a Channel
- Assign flash to a Group
On the Transmitter:
- Set the same Channel
- Select Group
- Set Group’s mode
- Set Group’s power
And there you have it! You learned how to sync a Godox TT600 with an XPro transmitter.
I really hope you found this post interesting, informative but also entertaining. If that is the case, please leave a comment below and share this post with your friends! But most of all, please remember to Stay Safe, Keep Learning and Keep Creating.
DISCLAIMER: Links included in this post might be affiliate links. If you purchase a product or service with the links that I provide I may receive a small commission at no additional charge to you. Thank you for supporting this blog so I can continue to provide you with free content every week!